1. Download the OTGS Installer
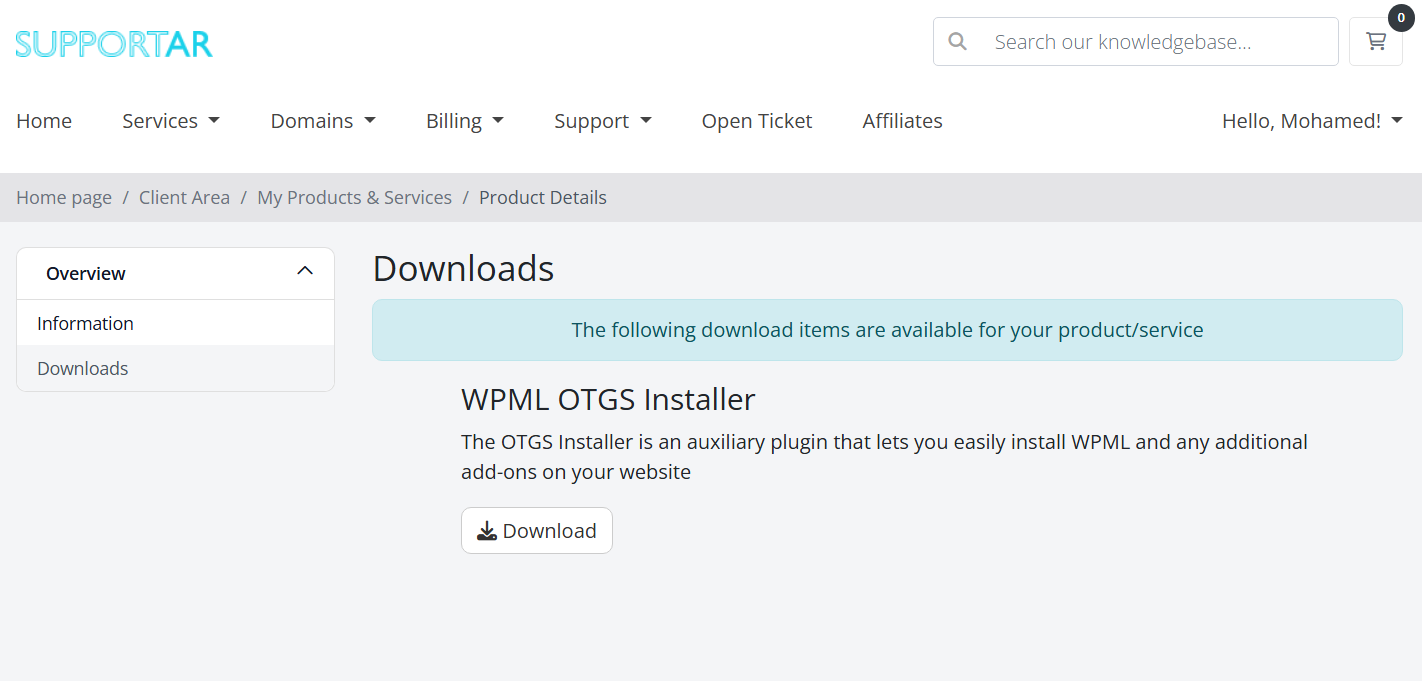
The OTGS Installer is an auxiliary plugin that lets you easily install WPML and any additional add-ons on your website. To download the OTGS Installer:
- Log into your account.
- Choose the requested service.
- On the left sidebar, click on Downloads.
- Click the download icon to the right of the WPML OTGS Installer container. This will download a ZIP file onto your computer.
- Log into your WordPress website and go to Plugins → Add Plugin.
- Click the Upload Plugin button at the top.
- Select the OTGS Installer ZIP file from your computer and click the Install now button.
- Click the Activate button.
A new menu labeled OTGS Installer will now appear in your WordPress admin sidebar.
2. Register WPML on Your Website
Once the OTGS Installer is active on your website, the next step is to register WPML:
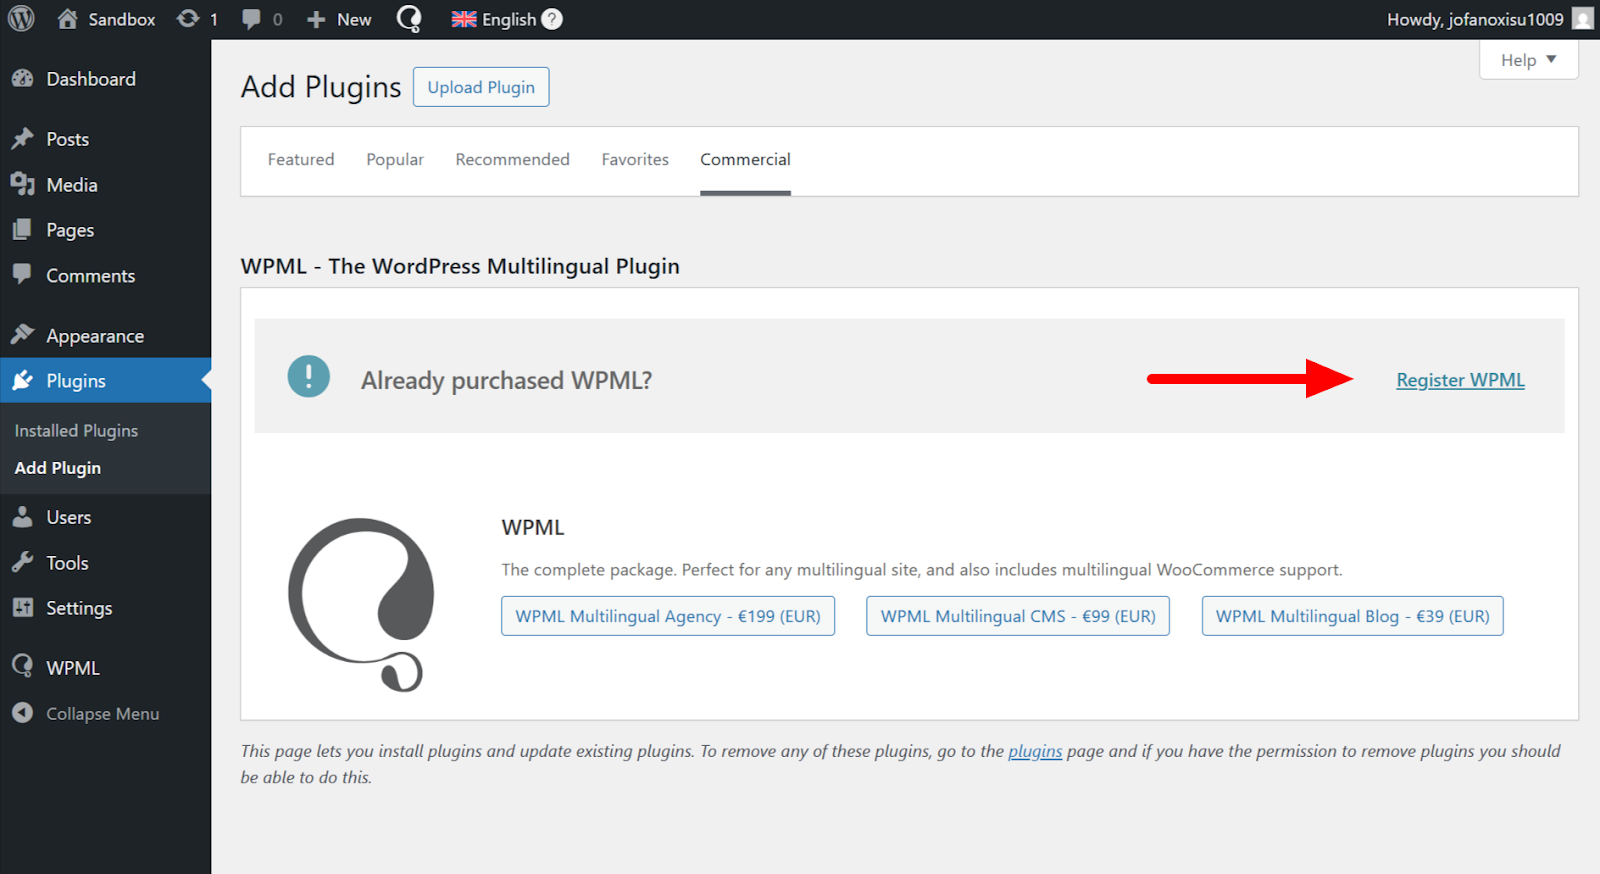
- Go to Plugins → Add Plugin and click the Commercial tab.
- Click the Register WPML link on the top-right corner.
- Use your license key your received from us. Copy it and return to your WordPress tab.
- Enter the key in the Site Key field and click the Register button.
WPML and any additional add-ons will now be available for installation.
3. Install WPML and Additional Add-ons
To install WPML and any additional add-ons:
- In the Commercial tab, select WPML Multilingual CMS (the core plugin) and String Translation (required add-on). If other addons are required, WPML will automatically select them. For example, the WPML Multilingual & Multicurrency for WooCommerce addon will automatically be selected if your site uses WooCommerce.
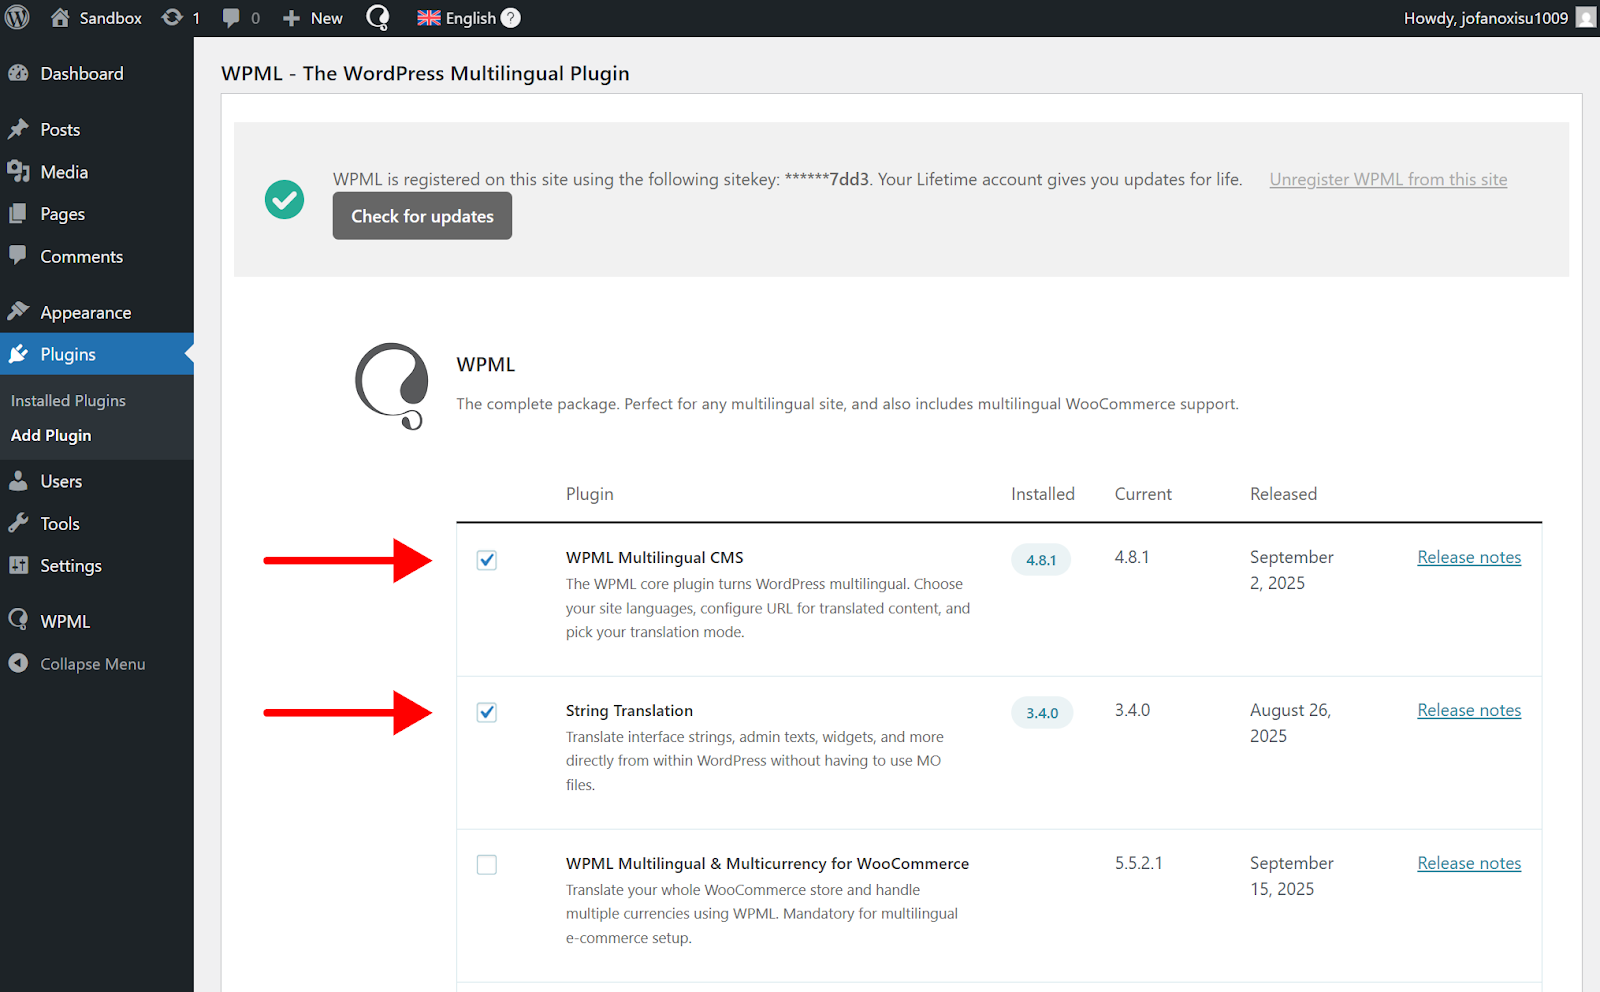
- Scroll down to the bottom of the page and check the Activate after download box.
- Click the Download button.
A new menu labeled WPML will now appear in the WordPress admin sidebar.
4. Complete the WPML Setup Wizard
The last step before you can start translating your website is completing the WPML setup wizard. To get started, go to WPML → Setup and complete the following steps:
- Choose target languages – click the field under Translation languages and enter the languages you want to translate into.
- Specify URL format – select your preferred URL format:
- Different languages in directories (recommended)
- A different domain per language
- Language name added as a parameter
- Register WPML – WPML will automatically enter your site key here.
- Provide Context – share information about your website to get better automatic translations:
- Name of your product / service / website
- What your website is about
- Who your target audience is
- Choose how to translate English terms – tell WPML whether to translate or not popular English terms (e.g., Email)
- Setup Human Translation – besides AI translation, choose how else you’d like to translate your website:
- Only by yourself
- With other users on your site
- With the help of a translation manager
- Indicate Support Preferences – select the YES option to get better support.
- Install Additional Add-ons – you should have all your add-ons by now, so proceed to the next step.
- Finished – WPML and its add-ons will now be ready for use on your website.
At this point, the next step is to start translating your website. See the Getting Started Guide for more information.